 Phomemo T02 Inkless Mini Printer
 Phomemo M02 Inkless Mini Printer
 Phomemo M02 PRO Bluetooth Mini Printer
 Phomemo M02S Bluetooth Mini Printer
 Phomemo M04S Mini Thermal Printer
 Phomemo D30 Portable Bluetooth Home Label Maker
 Etichettatrice domestica Bluetooth Phomemo P12 Pro
 【Preordina il 15 settembre】Phomemo P15 Etichettatrice per la casa Bluetooth
 Etichettatrice domestica Bluetooth Phomemo M950
 Phomemo Q30S Mini etichettatrice domestica
 Phomemo M110 Bluetooth Portable Thermal Business Label Maker
 Etichettatrice termica portatile Bluetooth Phomemo M220
 Phomemo M120 Bluetooth Portable Thermal Business Label Maker
 Phomemo M200 Bluetooth Portable Thermal Business Label Maker
 Etichettatrice termica portatile Bluetooth Phomemo M221
 Phomemo PM241-BT Bluetooth Shipping Label Printer
 Phomemo PM249-BTZ Stampante per etichette di spedizione Bluetooth Direct Connect
 Phomemo PM-246S High-Speed USB Direct Thermal Shipping Label Printer
 Stampante per etichette di spedizione Bluetooth Phomemo D520-BT
 [WIFI] Stampante per etichette di spedizione Phomemo PM344-WF 300DPI
 Phomemo M832 Upgrade Thermal Portable Printer
 Phomemo M08F Letter & A4 Portable Printer
 Stampante a trasferimento termico portatile Bluetooth Phomemo P831
 【Ultraleggera】Stampante termica portatile wireless Phomemo Q302
 Stampante per stencil per trasferimento di tatuaggi wireless Phomemo M08F
 Phomemo TP81 Stampante per modelli di tatuaggi wireless
 Stampante per stencil per tatuaggi wireless Phomemo TP83
 Per T02/M02X
 Per M02
 Per M02S
 Per M02PRO
 Per M04S
 Per M04AS
 Per M03
 M03AS
M03AS
 Per D30
 Per P12/P12 PRO
 Per D50
 Per M960
 Per P3200
 For M110/M120
 Per M200/M220/M221
 Phomemo 4''x 6'' Etichette termiche dirette a ventaglio per stampante per etichette di spedizione
 Etichetta termica rotonda multipla Phomemo da 2" per stampante per etichette di spedizione
 Phomemo 2" Silver Thermal Holographic Sticker for Shipping Label Printer
 Phomemo 2.25”x1.25” Square Thermal Labels For Shipping Label Printer (Roll of 1000 Labels)
 Phomemo 3" x 2" Shipping Label Stickers for Shipping Label Printer
 Per tatuaggi TP81/TP83/M08F
 Per M08F/Q302
 Per M832
 Per P831
![[NEW Arrival] Phomemo PM247-WF Wireless High-Speed Shipping Label Printer]( //phomemo.com/cdn/shop/files/Phomemo-PM-247-WFhigh-speed-ShippingLabel-Printer.jpg?v=1723100200 ) [NUOVO arrivo] Phomemo PM247-WF Stampante per etichette di spedizione wireless ad alta velocità
[NUOVO arrivo] Phomemo PM247-WF Stampante per etichette di spedizione wireless ad alta velocità
 Phomemo PM245-BTZ Stampante per etichette di spedizione Bluetooth Direct Connect
 Stampante termica per etichette di spedizione Phomemo PM201 o PM241 (specifiche della spina USA)
 Stampante termica per etichette di spedizione Phomemo I04 (specifiche della spina USA)


 PER PAPÀ-Phomemo Biglietto d'auguri pop-up 3D
 PER BAMBINI-Phomemo Biglietto d'auguri pop-up 3D
 PER IL COMPLEANNO-Phomemo Biglietto d'auguri pop-up 3D
 PER BAMBINI-Phomemo Biglietto d'auguri pop-up 3D
 PER BAMBINI-Phomemo Biglietto d'auguri pop-up 3D
 Biglietto d'auguri pop-up 3D Phomemo
 Adesivi di ringraziamento per imballaggi per piccole imprese
 Per bambini Adesivi rotondi con animali marini
 Phomemo M02 Mini Printer Gift Set
 Phomemo M110 Bluetooth Label Printer Gift Set
 Abito regalo per mini stampante Phomemo M02 PRO
 Phomemo 3 Rolls D30 Mini Inkless Label Printer Gift Set
 Confezione regalo per stampante per etichette Bluetooth Phomemo M220
 Confezione regalo mini stampante senza inchiostro Phomemo T02
 Set confezione regalo per stampante per etichette Bluetooth Phomemo M221
 Phomemo Hard Shell Machine Storage Bag
 Portable Multicolor Cosmetic Stationery Storage PU Pocket Bag for Organization
 Portable Black Velvet Stationery Cosmetic Multifunction Storage Bag for Organization
 Phomemo New Color Orange Hard Shell Machine Storage Bag
 Custodia portatile Phomemo per stampante M08F/P831
 Stackable Mini Storage Box | White & Transparent
 Phomemo Multi-Function Desktop Organization Box
 Phomemo Multi-Function Storage Box
 Phomemo Three-Layer Rotating Storage Box
 Phomemo Cosmetic Glass Box for Organization
 Phomemo Label Holder for Rolls and Fan-Fold Labels
 Phomemo Paper Holder for T02/M02/M02S/M02PRO/M03AS/M04AS/M04S
 Paper Holder For Phomemo Business Label Maker
 Phomemo T02 Thermal Mini Printer Rabbit & Cat Ears Protective Cover
 Phomemo 12 penne colorate per journaling

Parents of children who are required to wear a uniform or have a dress code at school will have the same problem: their child comes home from school with someone else's clothes. Especially for children in boarding schools, they will accidentally bring home a bunch of clothes that don't belong to them. It takes a certain amout of effort and time to ask teachers or other parents to exchange clothes. It can also be a hassle to identify which student's clothes have been mixed up.
Some parents will repeatedly ask their children to remember their clothes and pants, but for preschoolers who have to wear uniforms, this can be a difficult task.
Some parents choose to sew their child's name onto their clothes, but with so many clothes, sewing them one by one can take a lot of time, especially for naughty boys who are too likely to get dirty or tear their clothes, and clothes are updated very quickly. Sewing names is not the best way. In addition, for some parents with poor sewing skills, this is even an extremely difficult thing to do.
This is where label machine and iron-on clothing labels can help.
What are iron-on clothing labels?
Iron-on clothing labels are labels that can be attached to fabric by applying heat, usually with an iron. These labels are commonly used to personalize or identify clothing, especially for school uniforms, nursing home clothing, or camp attire.
The labels typically have a layer of adhesive on the back that melts and bonds with the fabric when heated, creating a durable and permanent attachment. They come in various materials, such as cotton, polyester, or nylon, and can be printed with names, logos, or other identifying information.

Benefits of using iron on name labels
Easy identification: No need to look for items at the school's lost and found - your child or teacher can easily find the labeled items at a glance, and there will be no embarrassing confusion.
Save time: Save a lot of time you waste looking for lost school uniforms.
Save money: Losing clothes means you need to buy replacements. With name labels for clothes, your child's clothes are less likely to be lost, which can save you money in the long run.
Suitable for all activities: Iron-on clothing labels are waterproof, so they will not be affected by mud, sweat and rain whether it is football training or school camp.
Easy to use: All you need is an iron and a few minutes to apply these labels.
How to choose iron-on clothing labels?
First of all, we need to start with the needs. Most parents need strong and durable name tags for clothes. When choosing a label ribbon, you can consider whether it is oil-proof, scratch-resistant, waterproof, wear-resistant, not easy to fade and other characteristics.
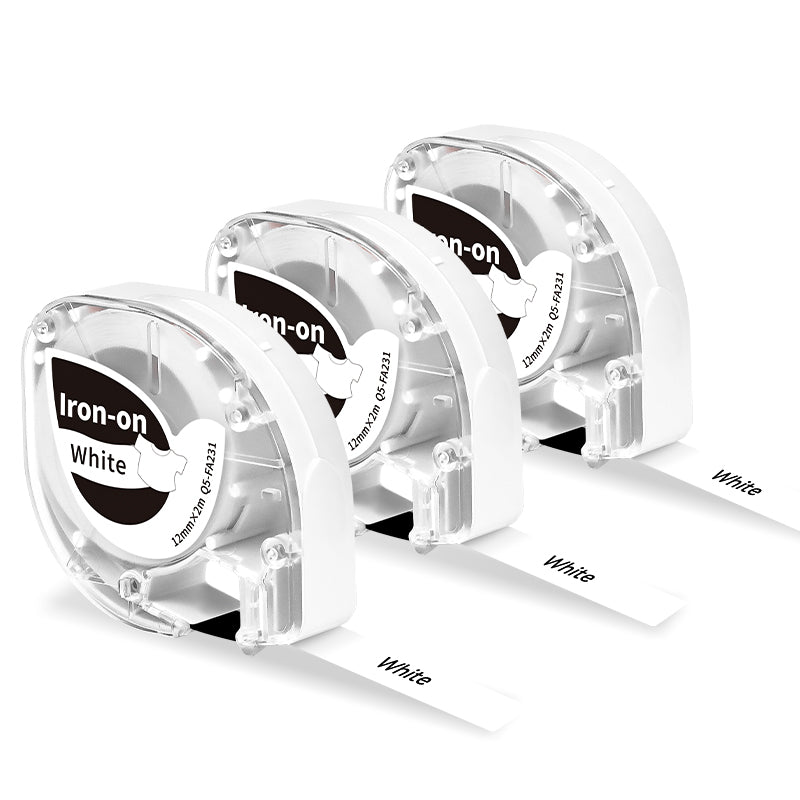
Iron-On Fabric Tapes
- Size: each 12mm wide x2m long.
- Features: waterproof, oil-resistant, self-adhesive, durable, good adhesion, and tear-resistant.
- Suitable for: Some Models of Dymo and Phomemo P12 and Phomemo P12 Pro.
In addition, in terms of aesthetics and diversity, you can also choose some iron on labels with more optional widths, colors and materials.
How to apply the iron on clothing labels?
Prepare tools: label machine, iron, iron-on labels, a layer of cotton fabric
1.Download the app for the label machine and connect the machine and mobile phone viaBluetooth.
2.Install the labels and select the corresponding label size on the app.
3.Edit yourchild's name. You can also choose different fonts and patterns according to your preferences.
4.Print the labels.

5.Heat the iron to medium temperature (no steam setting)
6.With the lettered side facing up, and put the label to the position you want.
(Most parents prefer to stick it on the bottom left or right corner of their children's clothes. The back of the neck and the edge of the sleeve are also good choices.)
7.Cover the label with a layer of cotton fabric and iron for 15-30 seconds
Tips💡:
If after many washings the corners start to lift, simply cover the label
with parchment paper and iron again. The adhesive will reactivate and your
label will be as good as new again!
How to remove a iron-on label?
It is important to note that quality iron-on clothing labels are designed to resist water, laundry chemicals, and general wear and tear. Therefore, sometimes these labels can be tricky to remove. However, Phomemo's iron-on labels also have the characteristic of being easy to peel off, leaving no residue behind after removal. Here is the easy way to remove unwanted iron-on labels:
STEP 1: First set the iron to the "wool" setting or medium-high heat (about 150°), and be sure to turn off the steam setting.
STEP 2: Lay the clothing label face up, smooth the label to make it flat and taut.
STEP 3: Cut a piece of baking paper or aluminum foil slightly larger than the label and place it on the label.
STEP 4: Press the heated iron against the paper or foil and move it around in small circular motions over the label. Take down the iron after 15 seconds or so.
STEP 5: Remove the paper or foil with tweezers, and then use tweezers to pick up a corner of the label, and you can remove the label.
Get Discount Code to Shop Now!
After reading this article, are you thinking of giving iron-on fabric labels a try on your kids' clothes? If so, don't miss out on the promotion of Phomemo thermal label maker P12 Pro! Use discount code LATEST8 at checkout to enjoy an 10% discount!
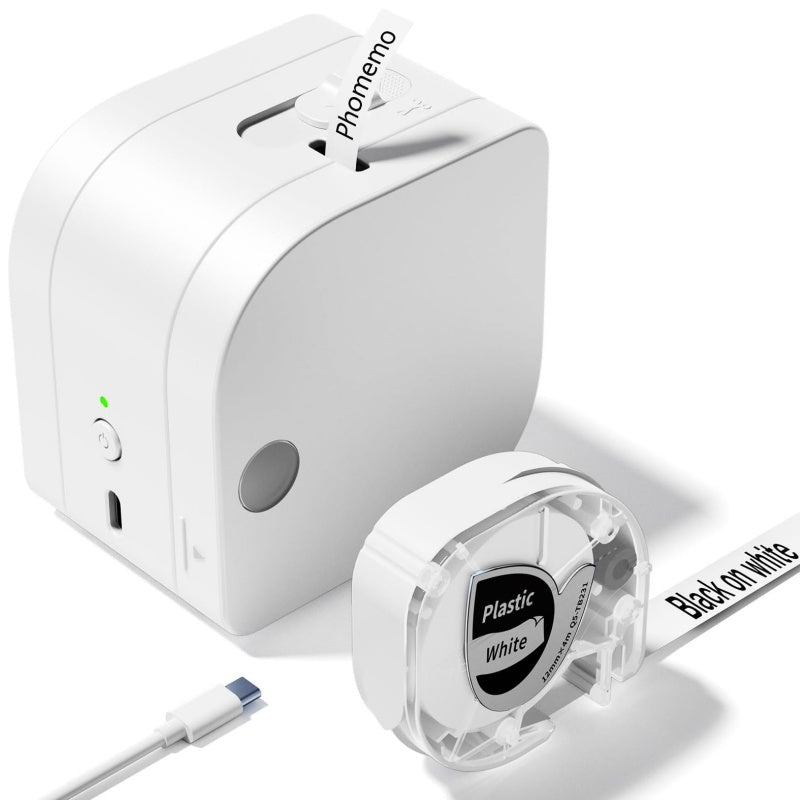
P12 Pro Label Maker
- Compact And Portable: Weighing only 220g and measuring 82*82*61mm
- Power & Capacity: Lithium battery, 1000mAh
- High Definition: 203dpi, smooth printing effects and pictures.
Frequently Asked Questions about Iron-on Labels
Why won't my iron-on label stick?
Drain all the water from the iron and check that the temperature is high enough. For most fabrics, the recommended temperature is between 150°C and 180°C. If the name tag for clothes sticks to the iron and not the clothing, the iron may be too hot. Turn the temperature down a bit and try again. It's common for iron-on name tags to need to be heated a second time.
Are iron-on labels better than adhesive thermal labels?
Scratch-resistant and waterproof adhesive thermal labels are perfect for lunch boxes, bento boxes, water bottles, books, and backpacks. If you want to add name tags to clothing or other fabric items, iron-on labels are the best choice. They stick well and stand up to wear and regular washing.
Will iron-on labels fall off in the wash?
No, if used properly, high-quality iron-on labels will not fall off in the wash. Phomemo's iron-on fabric tapes are 20% more abrasion-resistant than its competitors, making iron-on labels less likely to come off no matter how much your child moves in their labeled clothing or how vigorously they are shaken in the washing machine.
Will iron-on clothing labels stay put?
High-quality iron-on labels are safe for washing machines and dryers, waterproof, and built to withstand general wear and tear. Whether your kids are splashing in puddles or working up a sweat on the sports field, you can trust that these labels will stay put.
What are the best fabrics for clothing labels?
Cotton, linen, and polyester are best suited for labeling techniques like iron-on.


