 Phomemo M08F Letter & A4 Portable Printer
 Phomemo PM241-BT Bluetooth Shipping Label Printer
 Phomemo T02 Inkless Mini Printer
 Phomemo M02 Inkless Mini Printer
 Etichettatrice termica portatile Bluetooth Phomemo M220
 Phomemo A30 Portable Home Label Maker
 [❗️NEW❗️]Phomemo TP31 Bluetooth Tattoo Stencil Mini Printer
 Phomemo TP81 Stampante per modelli di tatuaggi wireless
 Stampante per stencil per tatuaggi wireless Phomemo M08F
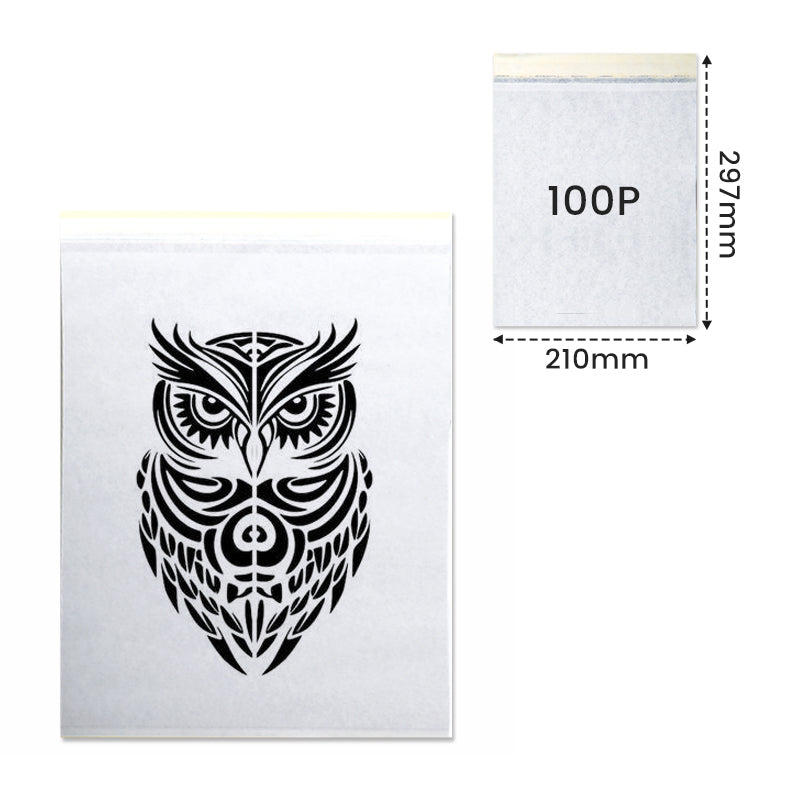
 Per tatuaggi TP81/TP83/M08F
 Set regalo mini stampante Phomemo M02 PRO
 Phomemo (M02 Mini Printer ) Christmas Gift Set
 Phomemo (T02 Inkless Mini Printer) Christmas Gift Set
 Phomemo (D30 Portable Label Maker) Christmas Gift Set
 Phomemo (A30 Portable Label Maker) Christmas Gift Set
 Accessories
 Storage Bags
 Storage Boxes
 Phomemo M02 PRO Bluetooth Mini Printer
 Phomemo M02S Bluetooth Mini Printer
 Phomemo M04S Mini Thermal Printer
 Phomemo D30 Portable Bluetooth Home Label Maker
 Etichettatrice domestica Bluetooth Phomemo P12 Pro
 Phomemo P12 Portable Bluetooth Home Label Maker
 Etichettatrice domestica Bluetooth Phomemo M950
 Phomemo M110 Bluetooth Portable Thermal Business Label Maker
 【🔥Vendita calda】 Etichettatrice termica portatile Bluetooth Phomemo M150
 Phomemo M200 Bluetooth Portable Thermal Business Label Maker
 Etichettatrice termica portatile Bluetooth Phomemo M221
 Phomemo PM249-BTZ Stampante per etichette di spedizione Bluetooth Direct Connect
 Phomemo PM-246S High-Speed USB Direct Thermal Shipping Label Printer
 Stampante per etichette di spedizione Bluetooth Phomemo D520-BT
 [WIFI] Stampante per etichette di spedizione Phomemo PM344-WF 300DPI
 【🔥Hot Sale】 Phomemo M832 Upgrade Thermal Portable Printer
 Stampante a trasferimento termico portatile Bluetooth Phomemo P831
 【Ultraleggera】Stampante termica portatile wireless Phomemo Q302
 Phomemo (M08F Letter & A4 Portable Printer) Christmas Gift Set
 Stampante per stencil per tatuaggi wireless Phomemo TP83
 Phomemo TP87 Wireless Tattoo Template Printer
 Per T02/M02X
 Per M02
 Per M02S
 For M02 PRO
 Per M03
 Per M04S
 Per M04AS
 For P2S
 Per D30
 For P15/A30
 Per P12/P12 PRO
 Per D50
 Per M960
 Per P3200
 For M110/M120/M150
 Per M200/M220/M221
 Phomemo 4''x 6'' Etichette termiche dirette a ventaglio per stampante per etichette di spedizione
 Etichetta termica rotonda multipla Phomemo da 2" per stampante per etichette di spedizione
 Phomemo 2" Silver Thermal Holographic Sticker for Shipping Label Printer
 Phomemo 2.25”x1.25” Square Thermal Labels For Shipping Label Printer (Roll of 1000 Labels)
 Phomemo 3"x2" Shipping Label Stickers for Shipping Label Printer
 Per M08F/Q302
 Per M832
 Per P831
 Per tatuaggi TP81/TP83/M08F

- Sei Facile Passi A Trasferire Tuo Tatuaggio Stampino su Pelle
- Chiave Competenze per Riuscito Tatuaggio Trasferimenti
- Comune Tatuaggio Trasferire Problemi
- Avanzando Tuo Trasferire Competenze
- IL Essenziale Utensili In Tatuaggio Trasferimenti
- Considerazioni finali

Stampante per stencil per tatuaggi
⭐ 182 Recensioni
Carta per trasferimento tatuaggi
⭐ 106 Recensioni
Trasferire uno stencil per tatuaggio sulla pelle è un passaggio cruciale nel processo di tatuaggio. Sebbene possa sembrare semplice, i contorni del corpo umano e le strutture muscolari lo rendono più impegnativo rispetto al trasferimento su una superficie piana. Questa guida ti guiderà attraverso il metodo di trasferimento di base, fornendo preziosi spunti per entrambi tatuaggio tatuatori principianti ed esperti.
Sei Facile Passaggi per trasferire il tuo tatuaggio Stampino sulla pelle
- Preparare lo stencil del tatuaggio
- Pulisci la pelle
- Confermare la posizione di trasferimento
- Applicare la soluzione di trasferimento
- Trasferisci il disegno sulla pelle
- Rimuovere la carta per completare il trasferimento
Fase 1: preparare lo stencil del tatuaggio
Il primo e più cruciale passaggio nel processo di trasferimento del tatuaggio è la preparazione di uno stencil di alta qualità. È qui che la tecnologia può migliorare significativamente il tuo flusso di lavoro. Prendi in considerazione l'utilizzo di un Stencil per tatuaggi Phomemo Stampante per creare stencil per tatuaggi precisi e dall'aspetto professionale.
Per preparare lo stencil del tatuaggio:
- Progetta il tuo tatuaggio utilizzando un software professionale, modificando dimensione, definizione e formato a seconda delle tue esigenze.
- Utilizza una stampante termica per tatuaggi per stampare il tuo disegno su carta per trasferimento tatuaggi .
- Assicuratevi che lo stencil stampato sia nitido e che tutti i dettagli siano visibili.
Fase 2: pulire la pelle
Una corretta preparazione della pelle è essenziale per un trasferimento di tatuaggio di successo. Segui questi passaggi:
- Utilizzare un sapone delicato (sapone verde o blu) per rimuovere il sebo superficiale e le cellule morte della pelle.
- Radere la zona del tatuaggio con un rasoio usa e getta per rimuovere eventuali peli.
- Pulisci nuovamente la zona con il sapone per rimuovere eventuali peli o detriti rimasti.
- Disinfettare la zona con alcol denaturato.
Questo accurato processo di pulizia garantisce una migliore adesione del tatuaggio e riduce il rischio di infezioni durante il processo di tatuaggio.
Passaggio 3: confermare la posizione di trasferimento
Prima di applicare la soluzione di trasferimento, è fondamentale confermare l'esatto posizionamento del tatuaggio con il cliente. Questo passaggio può salvarti da potenziali errori e insoddisfazione del cliente.
- Fissare temporaneamente la carta transfer alla pelle utilizzando del nastro adesivo.
- Utilizzare una penna per segnare i punti di riferimento sulla pelle.
- Se necessario, utilizzare un lungo righello per tracciare una linea centrale per l'allineamento.
- Chiedere al cliente di controllare la posizione davanti a uno specchio e di confermare che è soddisfatto del risultato.
Prendersi il tempo necessario per trovare la posizione corretta può evitare la necessità di ristampare e riposizionare, risparmiando tempo e materiali nel lungo periodo.
Fase 4: applicare la soluzione per il trasferimento dello stencil
Una volta confermata la posizione, è il momento di applicare la soluzione di trasferimento:
- Apri la carta per stencil del tatuaggio.
- Applicare uno strato sottile e uniforme di Stencil Gel o Stencil Cream sulla pelle.
- Estendere leggermente l'area di applicazione oltre le dimensioni dello stencil per garantire il trasferimento completo dei bordi.
- Aspetta che la soluzione sia leggermente asciutta: dovrebbe apparire lucida ma non bagnata al tatto.
La chiave per un trasferimento riuscito sta nell'applicazione corretta della soluzione di trasferimento. Troppo bagnata, e le linee saranno sfocate; troppo asciutta, e lo stencil non verrà trasferito correttamente.
Passaggio 5: Trasferisci il Stencil per tatuaggio sulla pelle
Questo passaggio richiede pazienza e mano ferma:
- Abbassare lentamente la carta per stencil del tatuaggio sulla pelle preparata.
- Utilizzare il palmo della mano per premere e fissare la carta per il trasferimento del tatuaggio, assicurandosi che l'intero disegno sia a contatto con la pelle.
- Fare attenzione a non far scorrere la carta o a non premere ripetutamente, poiché ciò potrebbe causare immagini doppie.
Per disegni più grandi o complessi, potresti prendere in considerazione l'utilizzo della stampante termica per tatuaggi A4/Letter di Phomemo. Ciò ti consente di creare stencil senza soluzione di continuità e di grandi dimensioni senza la necessità di trasferimenti multipli.

Fase 6: rimuovere la carta per completare il trasferimento
Fase finale del processo di trasferimento:
- Assicurarsi che l'intero disegno sia stato premuto sulla pelle.
- Staccare lentamente la carta, facendo attenzione a non rovinare la decalcomania.
- Se noti delle imperfezioni o delle zone mancanti, puoi ritoccarle con un pennarello per la pelle.
Se il tatuaggio Se il trasferimento non riesce, pulire la zona con alcol e ricominciare il tatuaggio.
Chiave Abilità s per di successo Tatuaggio Trasferimenti
I nuovi tatuatori spesso hanno difficoltà con trasferimenti sfocati o stencil che sbiadiscono troppo rapidamente durante il processo di tatuaggio. Ecco alcuni consigli da professionisti per migliorare le tue abilità di trasferimento:
- Evita di bagnare troppo: la causa più comune di trasferimenti sfocati è l'applicazione dello stencil quando la soluzione di trasferimento è troppo bagnata. Aspetta che sia appiccicosa ma non bagnata al tatto.
- Ridurre al minimo i movimenti: una volta posizionato lo stencil sulla pelle, evitare di farlo scivolare o riposizionarlo. Ciò può causare doppie linee o sbavature.
- Tecnica del doppio strato: per trasferimenti più duraturi, prova ad applicare due strati sottili di soluzione di trasferimento. Lascia asciugare quasi completamente il primo strato prima di applicare il secondo.
- Pressatura Center-Out: quando trasferisci, inizia premendo il centro dello stencil e procedi verso l'esterno. Questo aiuta a prevenire le bolle d'aria e assicura un trasferimento uniforme.
- Ridisegna se necessario: se la carta per stencil diventa sfocata a causa dell'uso ripetuto, è meglio stamparne una nuova utilizzando la stampante termica per tatuaggi piuttosto che rischiare un trasferimento scadente.
- Attendere il tempo di asciugatura: dopo il trasferimento, attendere circa 5 minuti affinché lo stencil si asciughi completamente prima di iniziare il tatuaggio.
- La pratica rende perfetti: non sottovalutare l'importanza della pratica. Prova a trasferire su diverse parti del corpo e con diverse dimensioni e forme di design.
Problemi comuni nel trasferimento dei tatuaggi
Anche i tatuatori esperti possono riscontrare problemi di trasferimento. Ecco alcuni problemi comuni e come affrontarli:
- Trasferimenti sbiaditi: se il tuo trasferimento sbiadisce troppo rapidamente durante il tatuaggio, prova la tecnica del doppio strato menzionata in precedenza. Inoltre, assicurati di utilizzare carta per trasferimento di alta qualità, come quelle compatibili con la stampante termica per tatuaggi di Phomemo.
- Linee sfocate: questo è solitamente causato dall'applicazione dello stencil quando la soluzione di trasferimento è troppo bagnata. Aspetta un po' di più perché diventi appiccicosa prima di applicare lo stencil.
- Trasferimenti incompleti: assicurati di applicare una pressione uniforme su tutto lo stencil. Per disegni più grandi, prendi in considerazione l'utilizzo di una stampante termica di formato più grande per creare un singolo stencil senza soluzione di continuità.
- Transfer non aderente: potrebbe essere dovuto a una preparazione insufficiente della pelle. Assicurarsi che l'area sia pulita, asciutta e priva di oli prima di applicare la soluzione di trasferimento.
- Trasferimenti distorti su superfici curve: quando lavori su aree con curvature significative, prendi in considerazione la possibilità di suddividere il tuo disegno in sezioni più piccole e trasferirle singolarmente.
Migliorare le tue capacità di trasferimento
Quando avrai acquisito maggiore dimestichezza con i trasferimenti di tatuaggi di base, mettiti alla prova con tecniche più complesse:
- Disegni su larga scala: esercitatevi a mettere insieme disegni più grandi che richiedono trasferimenti multipli. Le stampanti termiche di formato più grande di Phomemo possono cambiare le carte in tavola per creare stencil su larga scala senza soluzione di continuità.
- Wrapping Designs: impara a trasferire design che avvolgono arti o torsi. Ciò richiede di capire come apparirà il design quando il corpo si trova in posizioni diverse.
- Posizionamento di precisione: esercitati con i trasferimenti che richiedono un allineamento preciso, come disegni simmetrici o quelli che devono essere allineati con tatuaggi esistenti.
- Diversi tipi di pelle: sperimenta i trasferimenti su diversi tipi di pelle e texture. Alcuni clienti potrebbero avere una pelle grassa, secca o con cicatrici che richiede aggiustamenti alla tua tecnica.
- Soluzioni di trasferimento personalizzate: sebbene le soluzioni di trasferimento commerciali funzionino bene, alcuni artisti sviluppano le proprie soluzioni per esigenze specifiche. Sperimenta diverse formulazioni per trovare quella che funziona meglio per te.
IL Strumenti essenziali nei trasferimenti di tatuaggi
L'industria dei tatuaggi si è evoluta in modo significativo con l'introduzione di strumenti di progettazione digitale e tecnologie di stampa avanzate. Le stampanti per stencil per tatuaggi, come quelle prodotte da Phomemo, hanno rivoluzionato il processo di creazione degli stencil.
Vantaggi dell'utilizzo di un T stencil di tatuaggio il stampante includere:
- Coerenza: ogni stencil per tatuaggio viene stampato con la stessa elevata qualità, riducendo le variazioni tra una sessione e l'altra.
- Risparmio di tempo: stampa rapidamente progetti complessi che richiederebbero ore di disegno a mano.
- Precisione: ottieni dettagli complessi difficili da replicare manualmente.
- Scalabilità: ridimensiona facilmente i progetti senza perdere qualità.
- Igiene: ridurre il rischio di contaminazione incrociata utilizzando stencil nuovi per ogni cliente.
Quando si sceglie un stencil di tatuaggio il stampante , considera fattori come la risoluzione di stampa, la velocità e la compatibilità con varie carte transfer. La gamma di stampanti Phomemo offre opzioni adatte sia agli artisti alle prime armi che agli studi affermati. Usa il codice SUGGERIMENTI8 ora puoi risparmiare 10% !

Considerazioni finali
Padroneggiare l'arte dei trasferimenti di tatuaggi è un'abilità fondamentale per qualsiasi tatuatore. Richiede pratica, pazienza e attenzione ai dettagli. Seguendo i passaggi e i suggerimenti descritti in questa guida e sfruttando la tecnologia moderna come le stampanti termiche per tatuaggi di Phomemo, puoi migliorare significativamente la qualità e la coerenza dei tuoi trasferimenti.
Ricorda, un tatuaggio fantastico inizia con un transfer perfetto. Investi del tempo nell'affinare questa abilità e vedrai i risultati nei tuoi tatuaggi finiti. Che tu stia lavorando su un pezzo piccolo e delicato o su un disegno grande e complesso, i principi rimangono gli stessi: pulisci a fondo, posiziona con cura, trasferisci con precisione e sii sempre aperto all'apprendimento e al miglioramento della tua tecnica. Con dedizione e gli strumenti giusti, presto creerai dei transfer impeccabili che prepareranno il terreno per tatuaggi sbalorditivi.


