Phomemo TA81 Tattoo Stencil Printer - for Large Tattoos, Bluetooth Tattoo Printer Machine with Roll Transfer Paper, Compatible with Phone/Tablet/PC, Tattoo Supplies for Tattooing Artists & Studio, Standard Printer
ATTENTION:Beforeinstallation, pleaseensureprinter is connectedand turned on!
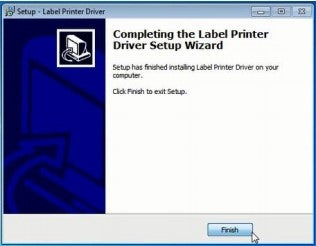
2.Followtheinstallationsteps until you receive this message.
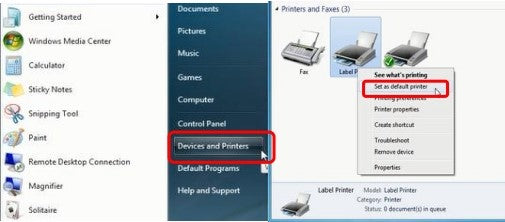
3.After installation, go to “Devices and Printers” -> right click on“Label Printer” ->set as defaultprinter
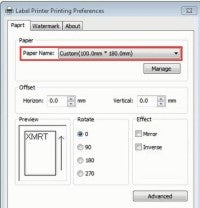
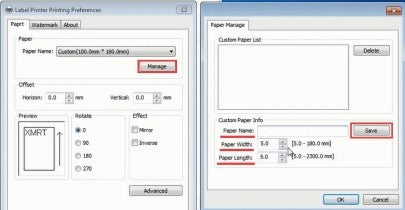
4.Select the paper type.
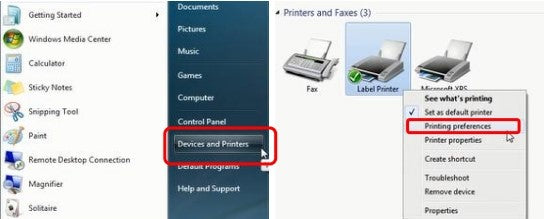
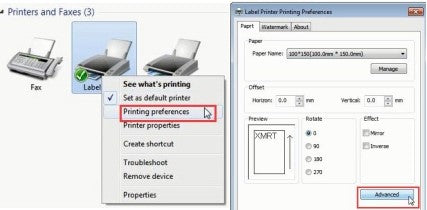
Open “Devices and Printers” -> right click on “Label Printer” -> choose “Printer Preferences”
You can choose the size you need in “Paper Name”. If the size you need is not listed, then click “Manage” to create needed size (input the size of "Paper Width","Paper Length" and "Paper Name", then click the "save" to archive.).
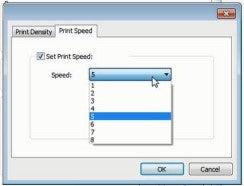
5.Set upPrint speedandDarkness
Open“DevicesandPrinters”-> right click on“LabelPrinter”->choose“PrinterPreferences”->click“Advanced”
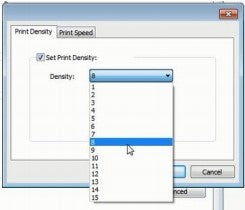
②Select "Print Density". (Density can range from 1-15. Factory default is "8".)
Installing Label Printer Driver on Windows and prepare before use
Before installing the driver, ensure the printer is connected to the computer via the printer’s cable. Then proceed to install the printer.
Here is the link to the driver: https://labelife.net/#/pm246s
Sign up now and receive a gift with your first order!
You can sign up to receive notifications via email and unsubscribe at any time.
Choosing a selection results in a full page refresh.
Opens in a new window.
You seem to be shopping from Europe.
AU
EU
You are currently on our US Store.
Switch to the EU Store to enjoy:
🎁 10% OFF your first order
⚡ Faster local shipping & EUR pricing
We use cookies to ensure the best experience on our website and assist with our marketing efforts. By
continuing to browse, you agree to our cookie policy.




 AU
AU
 EU
EU